September 29, 2009

Perfect Timing for a Peach Tart


Happy birthday to me! Well, early birthday. Nhat and I went to Best Buy today to buy a new laptop charger for his laptop and he (it was ALLL his idea) decided that we should look at digital cameras (since I’ve been wanting a new one for a while now). I had my mind set on the Canon Powershot SD780 IS for its size and picture quality. I didn’t want to get too fancy on the cameras as I am not a professional and we are not in the position to splurge. But as I was checking out the SD780, Nhat pointed out the Canon Powershot SX20 and the Canon Powershot SX120. I soon forgot about the SD780. I looked at both of the cameras he pointed out and fell in love…with the cameras ;). I took lots of pictures, tried out their zoom, and decided that the Powershot SX120 would be the best match for me. So here we are. Me and the lovely Canon Powershot SX120, ready for many new happy memories together. I haven’t posted any pictures from it because I’m still learning my way around it. But hopefully by the next blog I’ll have some up.

Now, back to what we’re here for…FOOD.

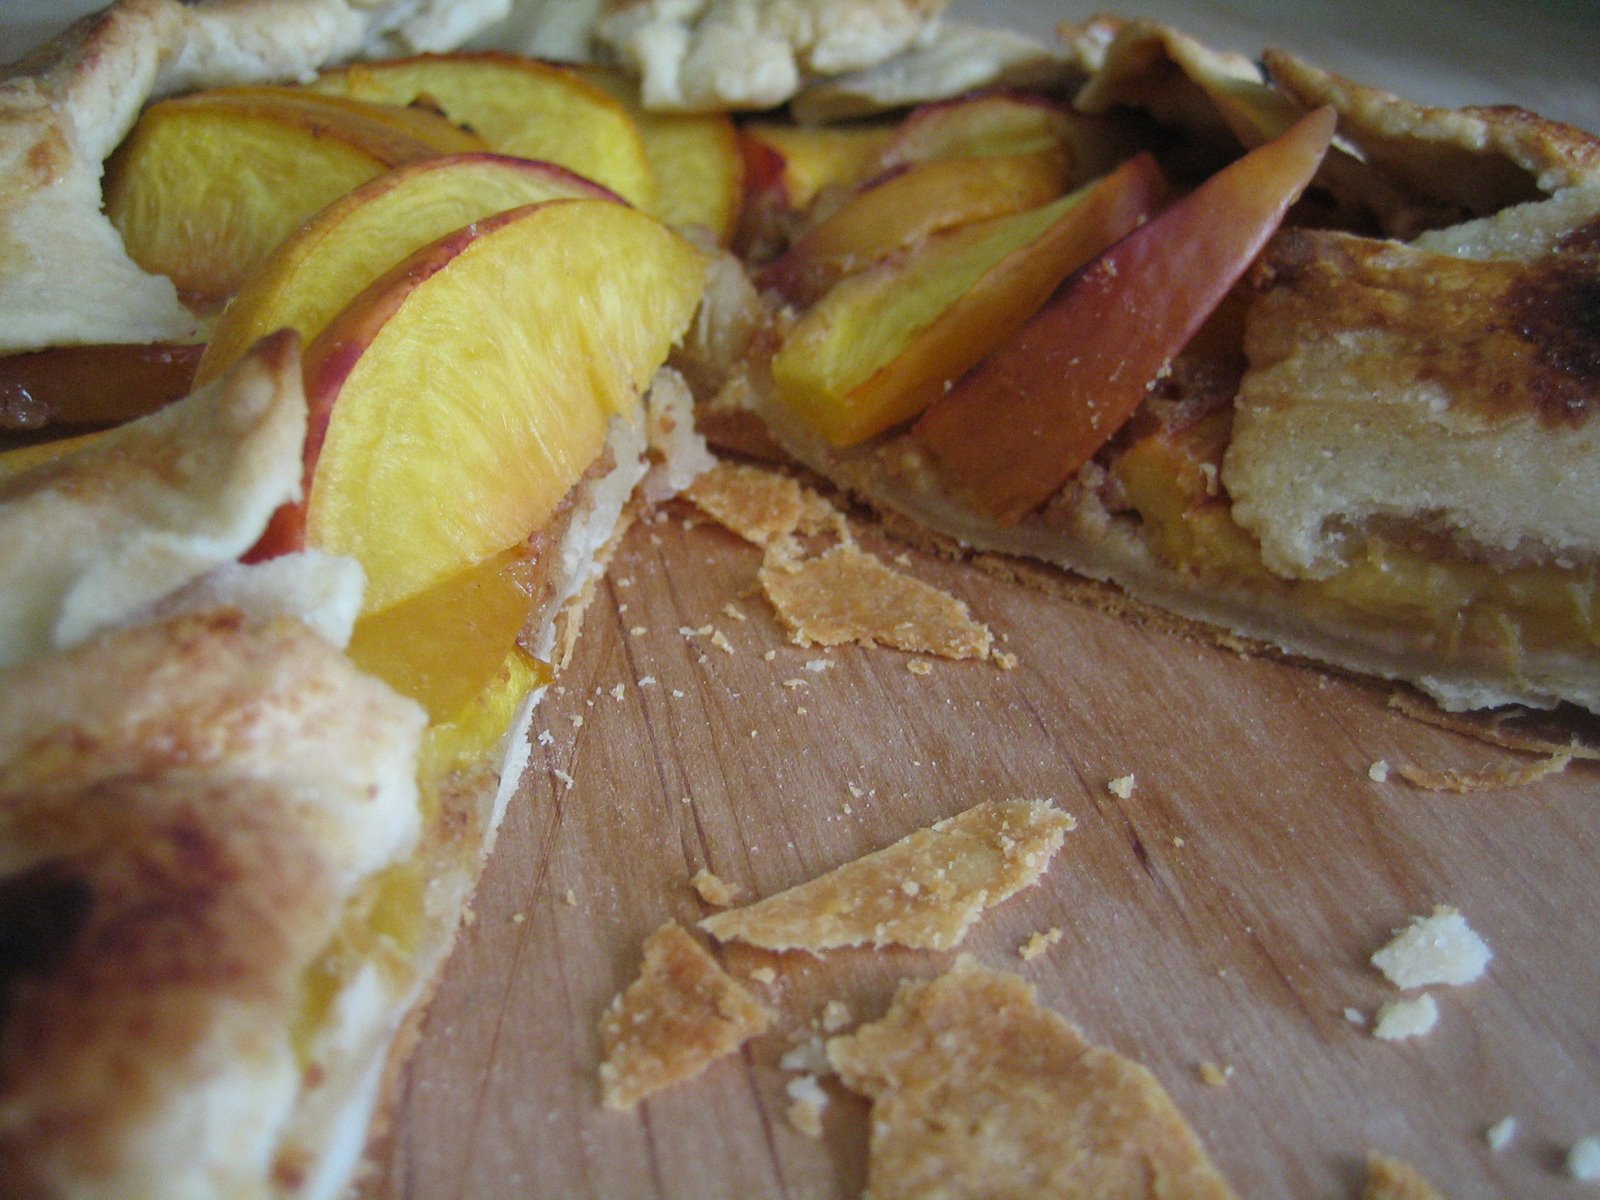
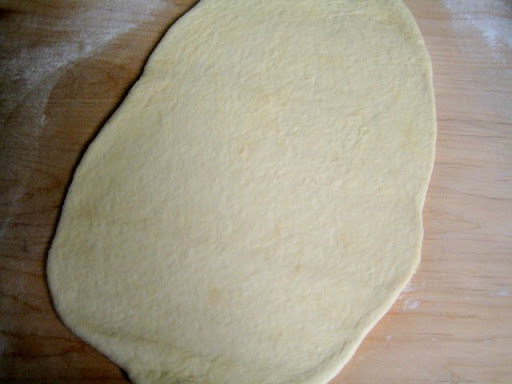
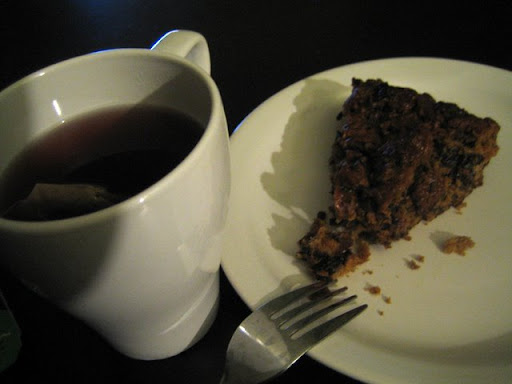
I baked my very first tart today! I know fall already started but the weather still feels…felt so summery. I wanted to make a peach tart before I was really too late into the season. Something inside me told me today may be my last chance this year to make a peach tart and still be seasonally correct. As I absorbed myself into tart making, the sun was shining, the skies were blue, and the weather was mild.

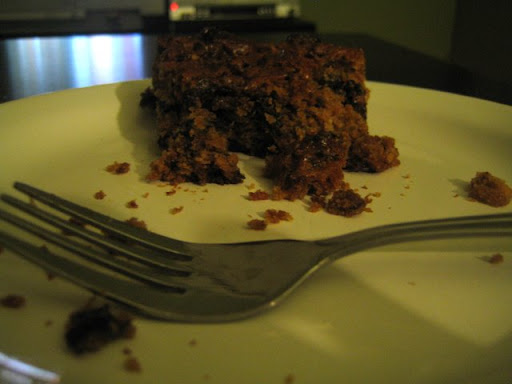
The tart came out better than I imagined. But probably because of temperature differences in my oven, the tart was a little too burnt on top and the peaches didn’t caramelized as nice as I hoped. I put the tart into the 400 degree oven for 40 minutes as instructed, but half way in, I checked on my tart and saw that it was burning at the top so I took it out 20 minutes early. It wasn’t all terrible. The crust actually came out amazingly well, sans the burnt parts. I was a little anxious because I changed the recipe I got in The Foodie Handbook by Pim. She used more flour and 2 sticks of butter. Without sounding like a health nut (which I’m really not), I just wanted to use 1 stick of butter. I adjusted the recipe accordingly and just prayed for the best. My crust came out wonderfully: light, flakey and as tasty as I could have hoped for. I think next time I will bake at 350 for 25-30 minutes and see how that goes. And just as I finished my tart, ironically enough, I looked outside and skies turned gray, almost as if it was going to rain, clouds filled the skies, and I knew I made the peach tart just in time.

I’m not going to post the recipe yet because I still want to try it again and get the temperature right. In the mean time you can enjoy (or not) the few photos I have of my very first peach tart.

Read more On "Perfect Timing for a Peach Tart"!

September 27, 2009

Pizza dough, conquered.


I took my first attempt at pizza dough today. I came, I saw, and I conquered! Okay maybe I didn’t conquer pizza dough, but I do think the pizza turned out fantastic for my first time at dough. I can’t take all the credit though. I actually got the recipe from Deb at the Smitten Kitchen. The recipe makes for a small pizza (perfect for two hungry people). I topped my pizza with store bought marinara sauce, mozzarella cheese, caramelized onions, sautéed sausages, and fresh basil. I baked the pizza at 350 degrees F for 11 minutes. It didn’t turn out crispy so next time I might try to figure out how to make it crispy. But it was still absolutely delectable!


Super Easy Pizza Dough
1 ½ cup flour
1 Tsp salt
¾ Tsp instant yeast
½ cup warm water
1 Tbs olive oil

Mix all dry ingredients. Add water, stir a bit then add oil and finish mixing the dough. Put dough on a floured surface and knead by pressing down and outwards on the dough. Pull the dough back to the center and knead again. Continue for about 2 minutes then put in an oiled bowl making sure to cover the dough with oil. I used Smitten Kitchen’s tip by using cooking spray to oil the bowl and it worked wonderfully. Seal bowl with cling wrap and let sit for about 2 hours.

After two hours the dough will rise. Seeing that my dough actually had risen, was really exciting to me =) After your dough doubles in size, plop the dough back on to the floured surface and push the air out of the dough. Roll the dough back into a ball and let sit for another 20-25 minutes. Now roll you dough out directly on the baking sheet and put on toppings. If you can’t roll you dough directly onto the baking sheet for whatever reason, roll the dough out onto a floured surface. To transfer to the baking sheet, wrap the dough around your rolling pin, transfer the pin to the baking sheet and slowly roll out the dough from the pin directly onto the sheet. THEN add your toppings. Bake at 350 degrees F for 11 minutes.
Read more On "Pizza dough, conquered."!

September 23, 2009

Jujube and Me


Have you ever substituted 1 cup of sugar for 1 cup of salt in a recipe? Do you know what that does to a recipe??? I'm sure you can imagine.  It just so happens that I had a near salt over-dose experience recently. As a matter of fact it happened this very day. Luckily I caught the mistake before I went too far into the recipe. I did, however, send one stick of butter, one cup of salt, one cup of water and two cups of minced jujubes into the abyss of my sink.

So what happened was that I was lounging around thinking today will be my very last free day. Tomorrow I was going to start my first day of training for a new job (that got cancelled by the way). So thinking today would be my last free day, I thought it would be a good day to try the jujube cake recipe I saw on the internet. It sounded easy enough: melt half cup butter, one cup sugar, one cup water and two cups minced dried jujubes. Then add dry ingredients to mixture.


Everything was going swimmingly easy. I had all the jujubes minced, I melted the butter, added the sugar, the water, then the jujubes. And now time to add the flour…or so I thought. Suddenly something inside me told me to taste this jujube syrup. I got a little bit of the mixture on a spoon, dipped in my finger and put it to my mouth… hmmm that’s strange... it’s salty. Actually it was VERY salty! That’s not right I thought, how can it be salty?  I didn't use any salty ingredients, I didn't add any salt! How can it be so salty??? And then it hit me like a ton bricks. I mistakenly mixed the canister of salt for the canister of sugar! NOOOO!!! I screamed out loud in the kitchen as I looked up to the ceiling for signs of relief.


Actually, I wasn’t that dramatic, but I was slightly frazzled. To my defense, my salt and sugar canisters do look very similar. But usually I can distinguish between the obvious differences in sizes. Oh well, $*&% happens. I tried to salvage the jujubes by rinsing them in water, but all efforts proved futile. A cup of salt is a vicious thing. And so to the abyss it went, and I started over. Don’t worry this story has a happy ending. My SECOND attempt at Jujube cake turned out very well and I successfully baked a handsomely sweet cake.

It's hard to explain the flavor of jujube.  As a cake, the jujube reminds me of fig newtons.  It has a mature taste.  The jujube imparts a very deep, rich sweetness when combined with the sugar and butter.  I found the recipe from hot dishes dot com. The cake goes perfect with a cup of hot tea. Tonight my tea of choice was a mixed berry tea with vanilla.

Read more On "Jujube and Me"!

September 21, 2009

Downsides and Upsides

I like where I live. I don’t love it. But it’s nice. Most days are quiet in the complex and the neighbors usually mind to themselves. I have most of the major shopping stores and probably any other store and restaurant I will ever need near by (within driving distance of 10-20 minutes), so it’s all very convenient. I feel safe walking my little Basil around the complex. Sometimes I even walk her outside my apartment complex (I make sure to do it with the company of Nhat of course). Maybe one day I’ll walk her outside the complex by myself, but not anytime soon. But yea, it’s a great area to live. It’s fairly peaceful, stores nearby, nice neighbors…all that good stuff.

BUT…I can think of one VERY big downside here and it IS a deal breaker. And by deal breaker I mean as soon as Nhat’s done with school, we (the whole happy little family) Nhat, Basil and me, we will be packing our stuff and looking elsewhere for residence. What is this downside that is so bad you ask? This terrible, awful, God forsaken downside is that there are NO farmers’ markets nearby! Well there is a Henry’s Farmer Market, but it’s not the kind I like. I want the open air market with all of its individual vendors with all their local goodies. I want the market close enough where I can walk or drive less than 20 minutes to get there! I want an open air market that will not charge me an entrance fee! Is that too much to ask for? I really don’t think so.

The closest open air farmer’s market to me is about 20-22 minutes away…AND you have to pay an entrance fee. Maybe one day I’ll fork up the money to see how that market is like, but I don’t see that happening yet. I did happen to find ONE more farmer’s market. After reading the reviews, I could see that it wasn’t an open air market (boo) but they seemed to have cheap and fresh produce and they carried specialty Indian and Mediterranean goods! And so yesterday, we ventured out to this market and did some exploring and grocery shopping.

After driving for about 20 minutes and thinking we might be lost, Nhat and I were relieved to find a huge sign that read Ontario Farmer’s Market. The name was surrounded by bright illustrations of beautiful vegetables. We pulled into the narrow parking lot with the narrow shaped store. There were glass and ceramic vases lined in rows outside the entrance. For some reason, the sight of miscellaneous goods for sale imparted a good comforting feeling on me.

As we walked into the store with our unusually small, kid-size shopping cart, I saw immediately why the carts were so small. The store was neat and organized but the rows between the aisles and barrels were tiny. This didn’t bother me one bit. It only added to the quaintness and authenticity of the market. My eyes quickly browsed the aisles of the many Mediterranean items, but I went straight to the produce. The reviews were right! They were very cheap. Hot house tomatoes for .49/lb! Boston lettuce for .99! Yes this market was cheap. My heart was fluttering was relief and excitement. As I walked around the bins of fruits and vegetables, the only thing dissapointing I noticed was a lot of their vegetables were very ripe. It took me some effort to find a few produce that were at ripe-but-not-going-bad -soon stage that I was looking for. We left with a few apples, tomatoes, nectarines and quite a few sweets. Oh the glorious sweets.


They had a bakery area with lots of cookies, cakes, and candies that we wanted to try. But being the well-behaved budgeting students we are, we only limited ourselves to a few. So we took home a bag of dark chocolate covered raisins, some pistachio nougats, and a little box of Turkish Delights.

Turkish Delights-fun name isn’t it? We both have always wanted to try Turkish Delights ever since we saw the little boy engulf them in Chronicles of Narnia. When we saw that the store sold it, we didn’t hesitate to purchase it. Maybe we were over zealous, maybe we just purchased the wrong kind, maybe we entranced by the magical name of “Turkish Delights”, but the yellow citrusy jelly interior was too sweet for my liking. Turkish Delights aside, we still purchased enough sweets to last for quite a while. Overall I had a very pleasant experience at Ontario Farmer’s Market and I look forward to going back and checking out their produce again. Yay.
Read more On "Downsides and Upsides"!

September 16, 2009

Simple and Delicious Salmon Cakes

I like to eat salmon. I think it’s fulfilling, has great flavor, and is packed with good stuff like Omega 3 fatty acids and protein. The thing is, sometimes I run out of ideas to make with it. And as great as anything is, after awhile I get bored. I’ve done mustard marinade, crusting it with roasted edamame, poaching, frying, baking…you name it, I’ve tried it with salmon.

Today I wanted to make salmon but was troubled with how to make it different, and suddenly while standing in the middle of my tiny kitchen, I had a revelation. Salmon cakes! Maybe I’ll try making salmon cakes!


After browsing through a couple of recipes on the internet and utilizing what I had at home, I think I successfully made a quite tasty (and simple) salmon cake recipe. I used Rachel Ray’s recipe as a guideline, but I think my recipe is fairly different in terms of ingredients. I used very simple ingredients to try to complement the taste of salmon. Just white onions, green onions, and garlic powder, some salt and pepper and that’s it.

Of course I also used eggs and bread crumbs for the binding agent, but I think that’s pretty simple. If I had dill, I probably would have used dill but I had to do without. I cooked the salmon cakes on each side for about 5 minutes which may have been too long. I would cut it down to maybe 3 or 4 minutes. I also made a very simple mayo sauce to go with it.

Simply Delicious Salmon Cakes
2 salmon filets (about 6 ounces each)
Half an onion chopped
2 green onions chopped
2 eggs
1 cup panko bread crumbs
1 tsp salt
1 tsp pepper
2 tsp garlic powder

Fry salmon filets then flake with fork. Let cool.
Combined bread crumbs, eggs, all onions, garlic powder, salt, and pepper.
Pat into round cakes about 3 inches in diameter and about ½ inch thick.
Fry on medium heat in some oil for approximately 3-4 minutes on each side. This makes about 6 cakes.

Mayo Sauce
½ cup mayonnaise
1 Tbs chopped capers
Juice of one lime
1 tsp chili powder
Combine all ingredients and serve.

It’s that simple! I served the cakes along with Italian style potato salad and a simple green salad with red wine vinaigrette.

Read more On "Simple and Delicious Salmon Cakes"!

September 15, 2009

Julie and Julia Movie

Yesterday Nhat finally took his exam that he’s been studying hard for all weekend, so we decided to celebrate and relax with dinner and movie. Where did we eat? Why none other than the Home Town Buffet (his choice hehe). I still left full and content after eating three different types of their desserts, a slice of banana crème pie, chocolate mousse, and some type of marshmallow crème thing (not t0o bad for Home Town eh?). And what did we watch? Well last night, I was thinking Nhat and I were due to watch a girly comedy. I felt the Julie and Julia movie was appropriate for our mood. Because of the all the mixed reviews, I wasn’t sure if I should just wait to rent the movie on DVD. But after much debate, I finally decided to watch it in theatres.

I know it’s been out for weeks, but at least this way I wouldn’t have to share the room with tons of other people. Sure enough when we walked into the dark theatre, I could see there were only two other girls sitting in there. I couldn’t tell if they were relieved or disappointed to see us walk in. Later on, 3 ladies came moseying in, making it a total of 7 people watching the movie! Not too bad for me.

I went into the movie not expecting too much, but I have to say I was pleasantly pleased through out the movie. Even Nhat laughed out loud many times while watching it. I thought that having two story lines would be a little confusing and maybe slightly annoying, but I think it was just doubled the affect of the movie and made it much more fun to watch. Although I do have to admit, I found myself a bit more captivated with Julia Child’s story line than Julie Powell’s story line. I still found both characters fun to watch and easy to love. I think I enjoyed the movie because I could relate to both Julia and Julie’s love of food. I understood their need to be involved with it.

I found it interesting that Julia lived to such a ripe and admirable age despite her love for butter and her diets consisting of foods high in saturated fats. In current times when all you hear about is eating low-fat and healthy organic foods (which I still think is the best diet if you can do it), it makes me wonder why some people can work so hard to be healthy yet end up with cancer and health problems when others can eat whatever they want, do whatever they want, and still live longer?

This is my THEORY. I think Julia lived to such a good age, because she lived a fulfilling life. While being aware of what you eat and what you put in your body is important for a healthy and happy life, I think what is even more important is your outlook on life. Find what you love and do what you love. Spend less time worrying about things and more time just enjoying your life day by day. I think the combined factors of how active you keep your life, how much you enjoy your life, and how much you push your limits each day is a better remedy for any illness in life than any food you put inside you. I do think eating healthy foods and having a healthy balanced diet is important, but not AS important as how you live your life. Live a lot, laugh a lot, and just be happy.
Read more On "Julie and Julia Movie"!

Out and About

Today has been a very productive day for me! I went to Michaels and bought some canvases to paint. I’m thinking of painting something for my dad’s birthday. I’m still brainstorming ideas. I haven’t been in Michael’s for so long. I think I could get lost in there and be completely happy. I watched all the people browsing all the arts and craft items and I wondered what their latest projects and ideas were. Michael’s already has seasonal items up for Fall and Halloween. Scarecrows, cornucopias, pumpkins…my eyes were flooded with the warm hues of brown, orange, red, and yellow. I absolutely loved it!

After Michaels, I wandered next door to HomeGoods. HomeGoods is another store I could just walk around in for hours and be completely and utterly content. I quickly acknowledged their seasonal area, but I knew what section my heart was calling for- the kitchen goods. I walk into the kitchen area and felt so happy. I let my eyes take in the beautiful tools, from silicon spatulas to artistic pepper mills to antique water kettles. I looked at all the cocktail shakers and had to muster up my inner strength to not spend any money (not until I get a job at least).

I walked out of HomeGoods empty handed. Nevertheless my spirits were still high and happy. My last adventure on my day out included the library. I’ve moved into my area for about 5 months now and have not been able to get a library card. Today I finally went in, signed the application and got myself a good-ole, comforting library card! Yay.
Read more On "Out and About"!

September 13, 2009

Suong Kho:: Vietnamese Caramelized Pork Spareribs


While they have that saying, “Traditions are meant to be broken,” I strongly feel some traditions are meant to be kept. Growing up in America as an immigrant in a relatively big family, as a child I always wanted to become more modernized and “Americanized”. I shamelessly pushed away my roots and wanted so bad to have the life of the typical “American” girl. I wanted my own room, at least my own bed. I wanted to wear shoes in the house. I wanted a matching bed set, with matching pillow cases and sheets- not those big furry blankets that put me to shame when my friends came over (I now believe these furry blankets are the most comfortable and warm blankets ever). I wanted to speak English to my parents. I didn’t want to use chopsticks. I wanted to use forks and spoons. I didn’t want to use bowls. I wanted plates.

No, there was nothing wrong with me wanting to adapt to the American culture, but there was something terribly wrong with me not accepting my own. Fortunately for me, as I became older, I realized how important my culture was to me. As I became more and more appreciative of my parents, I became more and more accepting and intrigued with my own heritage. After years of struggling with my culture and wanting to keep it in the dark, I am beginning to see my Vietnamese culture in a new light- and it is a radiant light!

Speaking of traditions and culture, one of the most traditional and nostalgic thing for me is a Vietnamese dish called “suon kho”.  It reminds me of my childhood, my parents and my home. It is basically pork spare ribs in a caramelized sauce (I know Izz, you don’t eat pork, that’s too bad hehe). When I moved away from my parents, I knew I had to learn to make it. Once I did learn the basics of the dish, I couldn’t believe how easy it was. Suon kho is traditionally served along with “canh” or soup such as canh bau (opo squash soup) and a nice bowl of steaming hot rice. Ironically, I’m not sure if this is the traditional way of making this. I found the basis for this recipe on a food forum a LONG while back so I don’t remember who posted it and I can’t seem to find the forum again so I can’t give credit to who posted it (sorry!).

Suon Kho - Vietnamese Caramelized Pork Spare Ribs
1.5 lbs of pork spare ribs, cut down the meat between the bones to have little pieces
2 Tbs brown sugar
1 shallot minced
1 Tbs garlic minced
1 pinch red pepper flakes
2 Tbs fish sauce
¼ cup water
1 Tbs olive oil

First rinse the pork and pat dry.
In a medium skillet on medium high heat, add olive oil, let pan heat up then add meat. It should make a sizzling sound so that you can get a nice browning on the ribs. Once all the meat is browned, add the sugar and 1 Tbs of the fish sauce and stir to incorporate. Continue cooking and turning the meat after about 2-3 minutes add garlic, shallots and pepper flakes. Continue cooking and turning the meat so it doesn’t burn.
Lower the heat to medium low and add the rest of the fish sauce and mix. Continue cooking. Once sugar caramelizes and meat looks nice and brown (close to burning) add the water and stir. After a while you should get a nice sauce. Total cooking time of the pork will vary depending on how big the pieces are. It took me about 20-30 minutes to cook the meat all the way. Garnish with green onions and serve!

Canh Bau – Opo Squash Soup

I actually found the recipe for this soup on recipezaar and it was the most authentic recipe I could find. 
Opo is a great vegetable to eat [and to say :)]. This is the first time I’ve cooked with it but it’s very easy to prepare. You can use it for soup or sauté them with some garlic and olive oil. Its subtle taste makes it very easy to manipulate into whatever flavors you like.  Best of all it is nutritious! Here are some more information on opo squash.
Read more On "Suong Kho:: Vietnamese Caramelized Pork Spareribs"!

September 12, 2009

Butterfly Pasta and Roasted Bell Peppers


Last night I knew it was time to use up the bell peppers I had sitting in the fridge for about a week. It's not that I didn't want to use them. I just didn't have the time. From going away the past weekend for Labor Day to settling back in after a short but very nice visit back home, there was no time to cook! But yesterday, I knew my precious bell pepper's shelf life was coming close. Fortunately, when I took them out of the fridge, they were still quite firm and bright and very tasty looking. I wanted to cut them up and eat them with ranch dressing right there!

But I needed to make dinner, and I already knew what I wanted to do with them. A while back I was watching Easyway Gourmet with Kris Capra (a very vibrant and enthusiastic lady to watch on TV) and she made a delicious looking dish with roasted bell peppers and farfalle pasta. I've always wanted to try it but I felt roasting bell peppers is too time consuming! Now I realize how wrong I was. The few extra minutes you put into roasting the peppers is WELL worth it.

I wasn't able to find the exact recipe but I put something together that I think went very well together. For this dish I used FARFALLE pasta which is better known as bow tie pasta. In Italy, farfalle is actually a word for "butterfly". And if you look at the shape of these cute little pasta, you'll see that they do indeed resemble a butterfly or a bowtie. I also had some chicken and apple sausage links my dad gave me from Labor Day weekend so I used that along with leftover shredded rotissere chicken. That's the good thing about this pasta dish, it's very versatile and you can use almost anything you like (within reason of course).

Roasted Bell Peppers and Butterfly Pasta- about 2 good size servings

2 sausage links (whichever kind you like, I used chicken and apple)
2 bell peppers
1/3 cup shredded chicken (optional, I had some left over)
2/3 cup chicken broth
1 lemon or lime (I prefer lemon but I only had lime at the time)
2 Tbs butter
1 ½ - 2 tbs capers (coarsely chopped)
1 tbs minced garlic (estimated)
1 pinch of red pepper flakes (optional)
1 tsp of Italian seasoning (optional)
2 cups farfalle (bowtie) pasta
2 tsp olive oil for the sauce
Canola oil for broiling the bell peppers
Salt and pepper (I acutally didn't add any extra salt aside from what I used for the bell peppers)

Preheat oven to broil, rub canola oil all over bell peppers and season with salt and pepper.
Broil peppers for about 10 minutes, turning peppers over half way, until charred (skin turns black). Take peppers out (careful they’re HOT) and transfer to a bowl and cover to let peppers cool.
Once bell pepper cools (should take about 20-30 minutes) remove the stem and peel off the skin of the bell peppers (the skin should come right off). Take out the seeds and cut the bell peppers into about 1 inch pieces then set aside. Discard stem, skin and seeds.

Meanwhile bring pot of water to boil. While waiting for the water to boil, mince garlic and capers and set aside. Take sausage links and cut into bite size pieces. Once water boils, salt the water generously then add the bowtie pasta. Give it a quick stir to prevent clumping. As pasta cooks, heat a large pan at medium heat. Add olive oil and cook the sausages. This should take about 7 minutes to get nice browning on the sausages. Remove sausages then add garlic, let garlic heat up then add chicken broth, butter, and juice of half of the lime. Stir and let butter melt. Once butter melts add capers, red pepper flakes, Italian seasoning and then lower the heat. Continue cooking the sauce for a few more minutes.

Once pasta finishes, add pasta to sauce and stir to incorporate all the sauce. Let cook for 1-2 minutes then add bell peppers and shreds of chicken. Continue mixing all the ingredients, then squeeze second half of lime and give pasta final stir. If you have fresh parsley or basil, chop some up and add to garnish and flavor!
Read more On "Butterfly Pasta and Roasted Bell Peppers"!